Wednesday, November 30, 2011

Quick Sewing FO

Just a short post (well, shorter than usual anyway) to show off my latest project.

Thread Catcher

ThreadCatcher1 For: my studio

Date: November 29, 2011

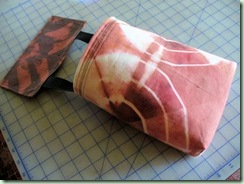
Materials: cotton muslin, sample pieces shibori-dyed in alizarin with rust from bulldog clips; lining – vintage heavyweight cotton, black; non-woven fusible interfacing.

Notions: Nylon webbing, black (recycled from an old backpack), Gutermann polyester sewing thread, black; nylon string-trimmer cord.

Pattern: Pincushion Thread Catcher from Kathy Beymer, free tutorial here.

Modifications: I didn’t stuff the pincushion but interfaced with stiff fusible interfacing and topstitched the edges. I used recycled nylon webbing for the straps. The bag was pretty much as instructed but I used string-trimmer cord for the boning. I also stitched a decorative band around the top edge of the bag.
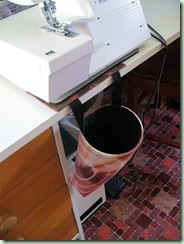
ThreadCatcher2 Comments: The decorative band was a little sloppy! I ran out of bobbin thread while stitching and backtacking with the black thread on the muslin showed more than I would have liked. Oh well. It’s functional anyhow and a nice reminder that my machine does have some interesting stitches that I never use.

The reason that I didn’t stuff the pincushion was so that it remained flat to fit underneath my serger which sits on an old mouse pad to keep down the vibrations and noise. I tucked it underneath the mouse pad in the exact spot to catch the strips from the cutters.

Now I want to make another smaller one for the sewing machine!

This is all part of my ongoing efforts to make my sewing experiences more comfortable and convenient. I’ve already noticed a big difference since I put a hook on the side of the sewing table right beside the sewing machine for the small scissors. Now I can access them easily and not lose them among the debris or have them get knocked on the floor with the risk of damaging either me, the floor or the scissors themselves. I don’t like them actually attached to me which might have been another option. I’ve tried wearing them around my neck but they seem to get in the way too much. And any connecting string or elastic or whatever just annoys me when I go to cut something.

Yesterday I also pinned up my press cloths to the wall near the ironing board using bulldog clips and pushpins. I have a teflon sheet, a square of silk organza, and an old baby diaper left over from when my kids were small. However judging by this article from Threads, I could probably stand to make a few more options!

Another project I want to get to eventually is a pressing ham. I have the sawdust – thanks to T-Man’s woodturning! And of course the appropriate fabrics are somewhere in the stash boxes. I just have to do it. Eventually.

But right now I have to go wash a mountain of dishes that has accumulated because I actually forgot to do them yesterday. I managed to get carried away looking at the clothes on the Navabi website. Go here and select your country, unless you can read German. I clicked the Canadian one just to see the prices. And then go to the Lagenlook Boutique. These clothes are very much my style though I guess not in my budget. Or probably not even in my size since I’m at the lowest end of their size scale and a lot of the garments are made in one or at most 2 general sizes. However, I can steal knock-off borrow the ideas with abandon now that I have some basic patterns to work with that really do fit me. The photos have a zoom feature that allows me to see sewing details in most of the garments – except the really black-black ones! The style photos on the model are a bit annoying though when they cover up the top I’m trying to view with another top, a handbag and the model’s hair. Don’t you agree that she should really get a more stylin’ haircut and funkier shoes so she looks like someone who actually wears these clothes? Or is it just me? The story of this company is interesting though. It’s here.
Monday, November 28, 2011

Japanese Indigo Seeds Success

If you’ve been reading along, you’ll recall that my first experience this year growing Japanese indigo (Persicaria tinctoria) was really successful. I also had really good results extracting and using the dye. I got several harvests during the season and could probably have gotten one more but unfortunately I was away on holiday and then didn’t have time when I got home in October. I used a very similar technique to the way I do woad - going from picking all the way through to dyeing in one continuous session. A couple of my friends came over to help each time and we dyed a variety of items and got good blues, though most of them past the first dip were fairly light, much like my usual results with woad. The continuous session vat is not very concentrated. But very pretty anyway!

Japanese indigo is obviously easy to grow and easy to use but the most worrisome thing for me was producing my own seeds for next year. The plants started to bloom in early September but the weather was getting cooler. In October we had a few light frosts so I picked a couple of stems that were well along in bloom and put them in a vase in a sunny window inside. They did well and even started rooting in the water. So later I picked a larger bouquet and added them to the collection.

JIndigo in vase

Yesterday I noticed that there were some mature seeds but also some of the flower stems were getting an infestation of aphids and the leaves were turning blue and drying out. They had to go so I chopped the flower stems off:

JIndigo flowers

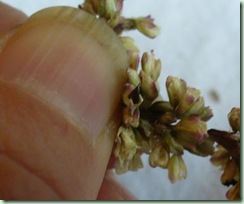
Some were starting to dry out but some were still very immature. I spent quite a lot of time carefully popping out the hard seeds from the flower heads between my fingernails:

JIndigo seed1

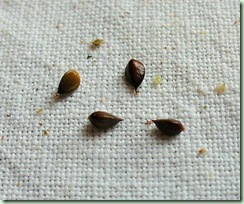
Some stems had quite a lot and some very few or none at all. As I sadly suspected! The shiny dark brown mature seeds are 3-sided and about as large as a sesame seed:

JIndigo seed2

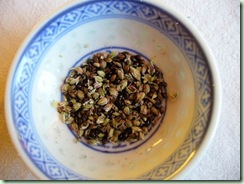
I didn’t find very many in total but I'm pretty sure I have enough for next year. Perhaps a teaspoon’s worth:

JIndigo seed3

I didn’t bother to clean the chaff off them all but no matter. I also have some seeds left from the ones I got by mail last February from a fellow enthusiast in Virginia. Even if germination is poor the second year I feel like they will be a fall-back if mine aren't good enough.

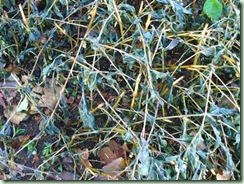
I was really glad that I'd brought some flower stems indoors when I did. My poor plants are now just a pile of bluish goo after we got an inch of snow last week!

JIndigo Nov_plants

Poor things. In contrast the woad right next to them survived just fine! Next spring I plan to try a few Japanese indigo plants in my greenhouse along with the tomatoes to see if that protects them better on their way to seed. It's quite amazing to me how long it takes for the flower heads to mature – 3 months. I guess it was just too cold for them to grow quickly. I heard about one person who kept running out each evening to put sheets over her crop and then removing the sheets each morning after it warmed up some. I could also try that I suppose although my dye patch is out along the boulevard where people walk by with their dogs so sheets might be rather vulnerable to tampering or destruction. We also had quite a few really strong winds this fall so they would have had to be very well secured. It is another option to consider though. Hey! I have a portable cold frame I could have used but never thought of it until just now. Next time.

It was a near thing but I’m happy to have at least a few home-grown seeds from my first crop of Japanese indigo. It’s a lovely dye and worth the space in my little dye garden. The next chapter of this story will resume in the spring.

Meanwhile I also have a Finished Object to share:

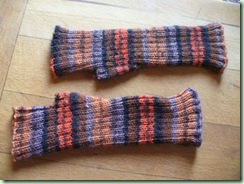
Autumn Gauntlets

AutumnMitts

For: me

Begun: November 20, 2011
Completed: November 25, 2011

Yarn: Patons Kroy Socks Stripes, colourway 1009 (oranges, browns, gray, black), 166 yds = 50g. About 1 ball out of the 6 that I purchased at Michael’s on sale.

Needles: Clover Takumi bamboo dpns, 2.25mm

Pattern: Jacoby from the Berroco Design Team, Ravelry link here, free pattern here.

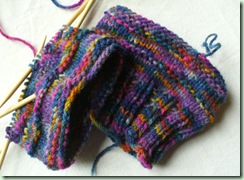
Modifications: I used the same cast-on as the kneehighs: cast-on, k 2 rows plain, change to 2/2 rib for the remainder of the cuff. I also made the cuff slightly longer. Otherwise, as she wrote.

Comments: A quick and easy but very useful fingerless mitt pattern. I didn’t try to match the stripes and went for a staggered effect just as with the knee socks. It took the rest of the 3rd and 4th balls of yarn left from the socks with very little left over. I still have 2 more balls of this yarn. Maybe a hat?

In other crafty news, the Dark o’the Moon gloves (using the Knotty Gloves pattern by Julia Mueller) are coming along. Still slowly but growing. I’ve decided that I need to pull out my poor sad Oatmeal Jacket because it just doesn’t fit properly. I think I’ll try to re-jig the pattern again and start over. I still can’t guarantee this will end up a wearable sweater but I’m nothing if not persistent. At least most of the time.

I have more sewing to get to as well. I don’t mind taking my time and hopefully doing things right, rather than whip something up quickly that either doesn’t fit properly or doesn’t hold up over time. I’m still exploring my new/old style, a different way of putting things together, more deliberate and less expedient. It does mean that I have to change more often! One outfit to go out walking. Another to rake leaves in. Light and comfy for my 20 minutes on the elliptical trainer. More layers when it gets cold in my house. However it’s much better than the old yoga pants and a t-shirt which was my usual uniform for the last few years. More me. Besides, the yoga pants are wearing out and NOTHING FITS ME in the stores. I’m obviously not the manufacturers’ “target audience”. (Who really is?) So I’m my own personal bespoke tailor instead. Take that, Ready-To-Wear!

Saturday, November 26, 2011

Clothing Revamp

I dove into my clothing drawers the other day, clearing out the no-longer-wearable and sorting and refolding the leftovers. I even vacuumed out the dust and waxed the runners under the drawers. Now they open so easily that I nearly yanked a drawer out onto my feet! Have I mentioned that our dresser and bureau are old, the former 1950’s vintage and the latter an actual antique from the turn of the last century. We also keep some items in a trunk that once served as the boot of an early jalopy. T-Man’s mom gave it to us when we married to be revamped with paint and upholstery and it’s been part of our bedroom furniture ever since. Even the closet wasn’t immune from the sorting and dusting process, though we haven’t tackled the stash that’s upstairs in my study’s big closet yet. That’s where we keep the seasonal stuff that rotates down to our bedroom and back and also the costumes and other garments that we just can’t part with but rarely (or never!) wear. I’m saving that area for another time.

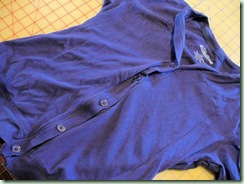
Anyway, in the process I came across 2 cotton jersey cardigans, one blue and one black, that I’ve had for several years. I realised that I couldn’t wear them because the front plackets were all skewed:

CardiBlue_before

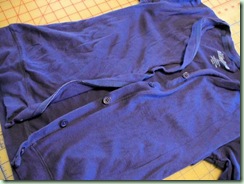
Can you see how rippled the fronts are? How about unbuttoned:

CardiBlue_unbuttoned

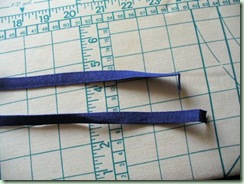
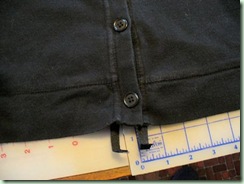
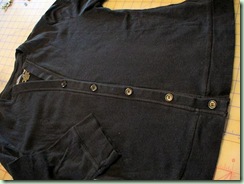
It’s doing a funky wave! I discovered that the reason is simple: the cotton jersey shrank in the wash but the stiff grosgrain ribbon that binds the inside seams of the plackets didn’t. So I picked them off, discovering that they weren’t even necessarily the same length!

CardiRibbons

Then I re-pinned them back in without stretching and there was at least an inch left over:

CardiBlack_repair

(I did the black one first.) After re-stitching the ribbons in properly the fronts lay much flatter and smoother:

CardiBlack_rep2

And now they are both wearable again:

CardiBlack_after

No more skewing and twisting and bubbling. Yay! The fix wasn’t hard at all, just a little time-consuming. A good lesson in pre-washing fabrics before sewing them too. I wish manufacturers would do that but of course that would be cost-prohibitive. They’re supposed to plan for shrinkage when drafting the patterns but of course it doesn’t always work out correctly. Especially when I have a tendency to machine wash warm and dry hot.

So there were quite a few things that ended up either in the salvage pile or in the garbage. More of the latter, especially from T’s drawers! They hadn’t been sorted in quite a few years and there were shirts with frayed collars, jeans and sweaters with holes, dress pants that no longer fit and t-shirts with faded and pilled neckbands. Lots of garments that hadn’t been worn in so long they were seriously dusty! Now I can happily get his jeans in their drawer without a fight. I saved a bunch of t-shirts to be cut up and snipped the buttons off the garbage shirts. And I even inherited a nice long-sleeved polo shirt that neither of us can remember where it came from and could never have fit him properly. However it fits me fine except the sleeves need to be turned up. That’s normal for any ready-to-wear because my arms are 2” shorter than most people’s anyhow. The buttons do up the guys’ way, but who cares? Score.

Now we know where the gaps are in our wardrobes and what we don’t need to buy again until something wears out. He needs more long-sleeved sport shirts and perhaps a pair of twill pants. I need a few more skirts, tunics and dresses – which I’m working on sewing! I do not need any short-sleeved t-shirts or leggings. Neither of us need any new handknit socks right now either. Might not stop me from making more though. Heh.

I kind of wish the Urge To Purge would hit me more often. Truth to tell, it’s much harder to get T-Man to join in and I won’t touch his stuff by myself. Absolutely verboten. And of course it’s only fair. I’d certainly hate it if he tried throwing out anything of mine! (As if he’d live to tell the tale.) Just one of our Rules for a Happy Marriage.

Tuesday, November 22, 2011

Attitude Of Gratitude

Yeah, I know it’s not Thanksgiving (at least here in Canada – we already had that in October) but today I am truly grateful. I’m very thankful for a warm dry house with electric power and running hot water. Last night we had a huge wind and rain storm that took out trees and power lines all over the place. T-Man and I woke up around 3:30am to a crashing sound. We still haven’t located the source though it sounded like a tree branch. At least it didn’t damage anything that I can see. I’m also grateful that T has an alternative to riding his bike on the littered roads without functioning streetlights and can instead drive the car to work. Most of all, I’m glad I didn’t have to go anywhere this morning. Traffic out there is a zoo.

Storm over. Moving on. A Finished Object!

Autumn Kneehighs

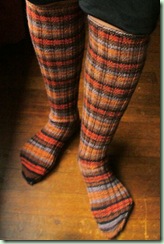
AutumnKneehighs

For: me (Yes, the photo is out of focus. You try taking a picture of your own feet and legs in the kind of low light we get this time of year! At least they’re finally dry. Took 2 days.)

Begun: October 27, 2011
Completed: November 20, 2011

Yarn: Patons Kroy Socks Stripes, colourway 1009 (oranges, browns, gray, black), 166 yds = 50g. About 2.7 balls out of the 6 that I purchased at Michael’s on sale.

Needles: Clover Takumi dpns, 2.25mm

Pattern: 110-31 Long socks in ”Fabel” with foot in rib or stockinette st, free pattern from DROPS Design. Ravelry link, DROPS link (the one on the Ravelry page is incorrect).

Modifications: I knit the middle of the 3 sizes with these mods: CO 80, follow patt until piece meas 9” before dec to 64 sts (k2, SSP, p1 around), k2/p2 6” to a total leg length of 15”, heel st on 26sts, regular heel turn, pick up 14 sts on heel flap, cont on 38 instep sts in rib and rest in st st, dec gussets to 22 sole sts (60 sts total), cont until foot is 7”, divide into 30 sts for top and 30 for sole and knit a reg toe, graft toe.

Comments: I didn’t try to match the stripes and went for a staggered effect. So why do most knee sock patterns have you make a leg only about 12” long? I’m only 5’3-1/2” and I still need 15” from knee to heel flap or they’re always falling down. I also have pretty skinny legs (at least from the knee down!) and used smaller needles than the pattern called for. These fit just exactly right.

Next I need to mention the eMag from Interweave that I downloaded a few days ago. This is the Winter 2011 issue of SpinKnit. (Link is for the PC version but there’s also one for Mac so don’t feel left out.) As the third issue in this series, I think this is a great way to present spinning information. Including videos is the best way to demonstrate techniques that you just can’t get across in words. Unfortunately the “knit” part of the equation gets kind of short shrift with only a few patterns in PDF format. However, there are lots of other avenues to get knitting patterns whereas spinning info is rather more limited.

This issue does include the delightful Sara Lamb dye-painting her lace-knit shawl. (Pattern included.) I’ve done this type of thing before and it takes supreme guts to dab dye all over your knitting that may have taken months to accomplish. The results are really interesting though and an effect that you can’t get any other way. Hope it inspires a few projects! One day I’d like to try this with natural dyes. I’ve already done it on a silk scarf but not on my knitting. Yet.

I think it’s lovely when your hard-earned expertise is validated by a well-known instructor with real skills. That’s how I felt when Stephanie Gausted spun a number of different fibres besides cotton on a tahkli exactly the way I do it! She didn’t spin cashmere though which I’ve done. <smirk>

And then there’s the story of the Imperial Stock Ranch in Oregon and the development of the Columbia Sheep. We’ve been both north and south of the 30,000-acre ranch on our travels but not in the exact area. However, the Deschutes River is the one we camped above at Cove Palisades State Park on our way home last time. And note the view of Mt. Hood behind Dan Carver in his interview. We drove right by this volcano! I feel like I’ve definitely experienced the land that this family loves and cares for. I’ve spun Columbia fleece too and it’s lovely stuff.

Another theme in this issue is silk and I loved watching the silk worker in China reeling the silk with a funky old foot-powered machine. Contrast the way the industrial machine works and the homemade setup of Michael Cook’s system and they all accomplish the same end: beautiful reeled silk yarns. There’s a lovely little tabletwoven band pattern included to make from some fine silk.

SpinKnit and Colorways are definitely my two favourites of Interweave’s eMags and I know I’m going to continue to get them because I get a lot of satisfaction from the interactive contents. Even if I do have to install them on my big desktop computer instead of my little netbook! The eMags are in a different (more common) screen ratio and it’s just too much scrolling to be comfortable. Besides, Bluet the Netbook’s sound quality isn’t great and I have to use earphones to hear anything. It’s much nicer to watch the big screen and listen to the big speakers. Less portable perhaps but I’m not complaining. I’m just lucky to have options. Attitude of gratitude again!

Monday, November 21, 2011

Just Had To Share

I’ve always been known by my family and friends as having a warped sense of humour. I can’t stand most comedians. Sitcoms leave me cold. Don’t bother telling me a classic joke. But it’s not that I don’t find things funny. Some things are absolutely hilarious to me! For instance, I discovered photos of Anna Hrachovec’s Gnomes vs Snowmen exhibit (recently at gallery hanahou in NYC) and I’ve been laughing about it ever since. Anna is the creator of Mochimochi Land and the author of two books of patterns for her cute quirky knitted critters. If you want a good giggle – assuming your sense of humour resembles mine (and, of course, Anna’s) in any way – download the PDF catalogue of the exhibit here so you can see the whole story. Then you’ll appreciate why I’m considering carrying around a scarf in case I see an aggressive snowman.

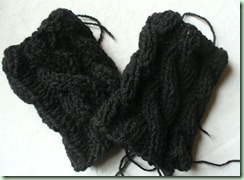
Moving right along…I finished my Autumn Kneehighs. A photo will be coming as soon as they are dry enough to model after their bath. Takes forever this time of year! And then there’s the low light situation as well. Gotta wait for sufficient natural light. Anyway, the socks look absolutely silly without a leg in them. All skinny and disproportionate. But they fit me just right. So of course I immediately cast on for matching gauntlets. I use my original pair of Jacoby Gauntlets all the time so since I have lots of yarn left over, I’m making another pair. They work great on their own but even better as an extra layer over my hand-knit gloves.

Speaking of which, I’ve started plugging away again on the Dark o’the Moon Gloves. They were hanging about mostly because the socks were easier to work on while reading at the same time. The dark yarn on my Blackthorn dpns is hard to see and they’re both teensy besides so these things take concentration. I’m nearly done the tricky cabled cuff part though on both gloves so things should go faster now. At least until I get to the fingers!

So T-Man went back to work today after taking some time off that was owed him before the end of the year. It seems really quiet around here now! I was getting used to having him handing me cups of tea, making breakfast, reading beside me in bed, fixing things, vacuuming up the dust buffaloes, and encouraging me to go on long walks with him. We’re practising for his retirement and it’s getting closer by the week. We’re both getting rather impatient.

Saturday, November 19, 2011

Winter Kicks Fall’s Butt

NovSnow

We’ve been having a slap of winter weather around here – right on top of the fall leaves, some of which haven’t even fallen yet. We also had a hailstorm yesterday on top of the inch or so of snow and a lot of the resulting mess hasn’t melted away as it usually does. Hardly anyone shovelled their walks either, thinking that it would all just go away by itself like it usually does around here. But it didn’t. This made walking rather treacherous today and I almost fell a time or two. Weirdly, most of the snow is in our neighbourhood. A half-kilometre in any direction and there’s barely any trace left. At least the sun was shining! I can still hear the cars crunching by on our street though.

Anyway, we did our civic duty and got out to vote in the municipal election, snow or no. There are people in the world who are giving up their lives for the right to vote in a democracy so I think the least we can do is make use of the freedom we have here in Canada. Your local government is the one that affects you most directly too. Water, streets, rescue and safety, parks, community centres, libraries – somebody’s got to run it all for us. Besides, if you don’t vote then you can’t complain about them not doing it the way you think they ought to. The right to bitch about our leaders ranks pretty high on my list of democratic freedoms and I try not to ever take it for granted. Wonder how many of the Occupy folks are voting today? Oh, all right. I’ll stop with the politics now since I try to steer away from that stormy sea on this blog. Just vote when you have an election going, ‘kay? Rant over.

So, I finally have a couple of semi-decent photos of my recent sewing. First finished is the Sleeveless Tunic:

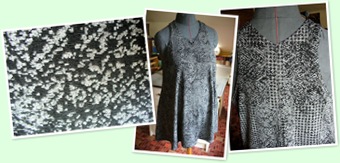
The inspiration came from a garment I saw awhile back on Fawbush’s website. (Love so many of their clothes!) This is a simple shape like an oversized undershirt that’s quite a bit wider at the hem, just two pattern pieces that I self-drafted. The fabric (detail, left) is one that I bought at Fabric Mart in Portland, OR on the way home from our vacation. It’s a kind of slinky knit in black with a graphic pattern in light gray somehow knitted into it. I cannot figure it out! I originally thought it was printed on but it’s not. It’s very spongy and extremely stretchy but has good recovery. The good news is that it’s pretty easy to sew and doesn’t ravel. This pattern only used a yard of 60” wide and I have another project which also uses this fabric. I had 2 yards total so it’s exciting to get two garments out of it.

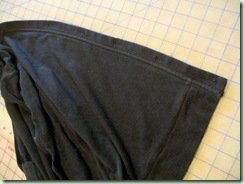
I ended up making a seam down the back (photo right) due to tight pattern placement on the fabric since I was cutting out both garments at once. The seam actually helped to make it easier to hem the neckline which was V-shaped at the back. I only used the sewing machine and not the serger to put together this quick top: a small zigzag for the regular seams and simple twin-needle hems. Since the fabric was super-stretchy I made sure to carefully stay-stitch the neckline and armholes before hemming. I had some trouble with the twin-needle stitching as one thread kept shredding and breaking. Turned out it was the needle and after changing to a fresh one, it sewed just fine. I luckily had a spare in the same 2.75mm width.

If I make this pattern again I’d like to add pockets! I didn’t have enough fabric for them this time. Either inseam or patch pockets would be really useful.

The second garment that I finished on Thursday was Banana Skirt Too, the second version I’ve made from BurdaStyle magazine, 07/2006 #125.

BlackBananaSkirt

I love my heavy gray double-knit one so I decided I needed a black one as well. This fabric is a rayon/lycra knit and a lighter weight than my gray skirt fabric. It also creases easier as you might be able to tell from the photo! However, it’s very swishy and soft as well as quite stretchy. Very successful as a skirt. I had 3 metres so the rest of it is going to become a long-sleeved cowl-neck tunic and the contrast yoke and sleeves on a dress from the remainder of the above novelty slinky.

This skirt is really simple, just one asymmetrical pattern piece cut out six times. I forgot that you needed to cut each piece right side up though so they’re all going the same way! Luckily the fabric is identical on both sides or it would have been a disaster. I marked the pattern clearly so I won’t forget next time.

This time I used the serger more than the sewing machine and serged a wide 3-thread stitch to join the pieces and also along the top edge before folding it over and multi-stitch zigzagging a casing for the elastic. This is different than the way I did the elastic on the gray skirt but still simple and quick. The hem was cover-stitched. I decided in this case it was worth the effort to change the serger over to the cover stitch – though it’s quite involved and takes a few minutes to do it. Now I have to change it back again before the next project. It’s not hard but because I don’t do it often I need a cheat sheet to remember all the steps each time!

This skirt goes with everything and I’ve already worn it several times. Which is probably why it’s so wrinkled.

Monday, November 14, 2011

All-Sorts

In my youth when I had more of a sweet tooth, I used to love liquorice all-sorts. Haven’t tasted them in years. I can imagine it though. Unfortunately this post doesn’t have any liquorice in it but it does have lots of different items.

Firstly, I forgot to mention our adventures at the Circle Craft Christmas Market last Wednesday. It took place in the huge new section of the Vancouver Convention Centre and was very nicely done. It took hours to go through all the booths but T-Man and I managed to do the whole thing, with only a short break for perogies and Ukrainian sausage to fortify us. It was lovely to visit with several friends in their booths: Yoriko Oki, Laura Fry and her husband Doug, and Carmen of MelonHead Knitwear. There was a really good mix of crafts this year: jewelry, glass, ceramics, wood, metal, leather, clothing, accessories, and food plus some unique items such as the pebble art pictures from the beaches of Nova Scotia and the freaky iron sculptures by Jim Nodge. I thought there was a larger-than-usual number of clothing artists and lots of hats. Many artists were using a least a portion of recycled and repurposed materials in their work which was great to see. But what’s with the multitudes of pet clothing and accessories? It would have been fun to try on some of the garments (not the doggie ones!) but since I wasn’t going to buy them and the rare changing rooms were just a curtain, it wasn’t worth the effort. Good to see some pieces that would look good on many body types though.

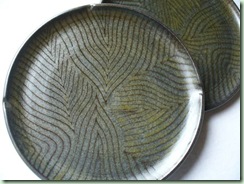
Of course T enjoyed the lampwork glass. We agreed the best by far was Lori Steel of Dragonfly Organic Arts. Her pieces have a depth and complexity but are not at all frou-frou. Like her company’s name: organic. Love. However, we didn’t buy. We were on a mission – to find two plates for our everyday dinners. Do you know how hard it is to find a potter who makes plates? Nice practical plates? We were nearly done exploring every isle without success when we came upon Matthew Freed’s booth. He’s a local artisan that we hadn’t discovered yet and we both loved his work. So we bought these lovelies:

MatthewFreed plates

Those are hand-painted lines, not decals. The glaze is slightly matte and includes many colours while looking neutral gray in most lights. I love the little pinches on the edges and the size is not too large. Best of all he signs his work on the back so we can’t forget who made them! And if we decide to get them later he also makes matching bowls in different sizes. We’ve already had a couple of meals on our new plates and we’re both very pleased. At least they aren’t boring white like all the commercially made dishes we’ve seen lately!

It was really fun and inspiring to see what everyone is making these days. Of course we don’t give Christmas presents so that wasn’t our purpose in going. It was our brand of entertainment. Afterwards we were hungry again so we went to Steamworks just down the street for a beer and a plate of bagel chips and crab dip. Yum. A very nice date.

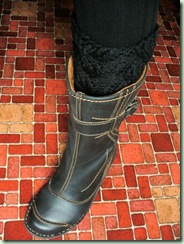
What else? Oh yeah. I got to test out my black Boot Buffers yesterday:

BootBuffers2 in action

We went for one of our usual long walks and although they slid down a little they stayed in place pretty well and were very comfortable. Saved my striped tights from damage too which was the whole point. Unfortunately the first set of Boot Buffers in handspun green yarn are too short and too tight so I’ll have to revise them to match the black ones. I also promise to get a photo of the Boot Cuffs in action eventually. They haven’t had their test run yet.

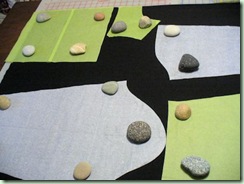
I also managed to finish cutting out Garment Number 4 so now I’m on a sewing jag. Don’t you like my new beach pebble pattern weights?

BeachRockWeights

I keep them in a basket near my cutting table and they work really well while pleasing my eye with their colours and shapes. Best part is they were free – a reminder of our recent holiday. Some are from Jackson Lake in Wyoming and some are from Whidbey Island in Washington. Farthest east and farthest west that we went, from fresh and salt waters, all glacier-smoothed. There’s a kind of natural poetry there, doncha think?

Anywho, I managed to squeeze a long-sleeved dress, a long-sleeved tunic, a sleeveless tunic and a skirt from 2 pieces of 58-60” knit fabric, just over 5 yards in total. I think that’s pretty efficient, don’t you? Except that the last pieces didn’t interlock very well leaving a lot of unusable scraps. I did have to fudge just a little and shorten the cowl on the long-sleeved tunic by an inch. Don’t think it will matter because I’ve decided to skew it to make it more interesting. You’ll see what I mean. I also originally wanted to self-line the contrast yoke on the dress but since I ran out of fabric I’m going to go with just hemming the neck with cross-grain strips instead. Improvisation is good. The patterns are all either self-drafted or much-adjusted from the originals. Wish me luck that they will fit properly.

Saturday, November 12, 2011

Rescuing A CPW

T-Man and I had an adventure yesterday afternoon. First I’ll list the changeable weather: raining hard all morning, stopped in the afternoon, then hail along with a crash of thunder, wind picked up to gale force for a short time as finally the sun came out but it was still quite windy all evening. I mention this because it was quite spectacular! The wind was so strong that it created a blizzard of fall leaves and nearly denuded some of the trees in moments. We were due to walk down to a newbie spinner’s house to check out her borrowed spinning wheel. Luckily the timing worked well and we missed the worst of the wild weather!

However, on our walk down to Strathcona (one of the oldest neighbourhoods in the city) we saw a parked car that had been squished by the weight of half a sweetgum tree that landed on it. The police were there taping it off since the tree covered the road. Who knows if the poor owner even knew yet of his/her car’s misfortune. Elsewhere we only saw a few small branches down while the wind was making the most amazing drifts out of all the gorgeous leaves. They were literally dancing! So fun to watch. Sorry I didn’t take a video.

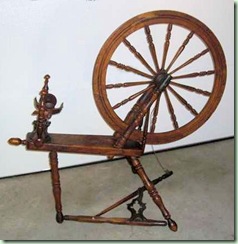
Now lets talk about the wheel. E didn’t know what she had acquired so T and I didn’t have a clue what to expect. I was surprised to see a Canadian Production Wheel, stamped (in a number of places on the table) “Frs. Bordua, St. Marc, RC” and including the letters FB on the cast iron support for the mother-of-all. Obviously they wanted you to know who made it! Unlike some wheels where it becomes a sleuthing ordeal requiring Holmsian skills to deduce the provenance. To wit: I never did find out anything about the decorative little parlour wheel I have.

This one was easy-peasy. This morning I just googled the name and it pointed right away to an antiques website with the answer:

“The makers of this spinning wheel were a well-known Canadian family. The two brothers, Francois and Frederic, and Frederic's son Theodore, were builders of this style of Canadian Production wheel (CPW) in the late 1800's and early 1900's. These were made in Quebec, Canada (Ste Hyacinthe, Ste Marc, Ste Charles).”

I borrowed a photo from someone (since I forgot to take one of E’s wheel). This one is quite similar:

Quebec Bordua Wheel

Isn’t it lovely? Distinctive characteristics are the large wheel diameter, iron treadle and mother-of-all support, wire footman and bent wire hooks, and a non-functional knob on the end of the table. E’s wheel had a little damage to the wheel rim and treadle bar but was otherwise in pretty good shape. The only real problem was that the bobbin was entirely seized to the flyer with old gunk. It took a while to loosen and clean it and we didn’t want to force the whorl off since we weren’t really sure how it was attached: pressure-fit or screw-threaded. It turned out to be screwed on and T finally got it to release so he could scrape the flyer’s rod and the bobbin ends clean. A lot of oil was applied to all the parts and a new double-drive string put on and now…she works just fine!

The tension adjustment is a bit fiddly. You have to turn a wing nut on the mother-of-all’s iron support to loosen the whole mother-of-all and then manually twist it closer or further from the wheel. Then tighten the wing nut back up again before it slips out of position. However, since it’s a double-drive wheel it doesn’t need such delicate adjustments as, say, a Scotch-tension would. It has quite a definite draw-in and a large ratio so it was made to produce fine strong weaving yarns quickly. However the bobbin is quite small and there’s only one of them (of course!) so a lot of winding off will be necessary. E will have to learn the skills to conform to the wheel rather than the other way around. Good practice.

Isn’t it satisfying to give an old wheel a new life? I was really happy that it wasn’t a “junker”! That has happened all too often when someone asks me to help them get an antique wheel going. Either something is broken or missing or it just doesn’t work well because it wasn’t made by someone who knew what they were doing. There are a surprising number of “decoration” wheels out there. Often lovingly made by a woodworker without the necessary knowledge to make sure it functions as it should. I once came across one without even an orifice for the yarn to travel through! It was just a solid rod. The wheel treadled around but that was the limit of its abilities. So sad. I have a junker in my closet right now and just haven’t gotten up the guts to dispose of it yet. I certainly wouldn’t wish it on any poor spinner. It’s impossible.

Of course missing or broken pieces can be repaired but you have to decide whether it will be worth the effort first. T-Man has always promised that one day he’ll restore the little parlour wheel.  It has a quite a lot of damage including fancy turned bone pieces to repair and a bunch of little dangly bobbles missing under the table. Unfortunately I never got the distaff that the original owner promised to locate. We’ll have to imagine what it looked like to reproduce it. Might be a fun project for him after he retires.

Thursday, November 10, 2011

Boot Buffers

Granny Time with Rosebud, the Littlest Grandbeastie, went really well yesterday. We had a very fun time together! We played with toys, practiced important skills like “put it in the box” and “walkies holding hands” and “I stack ’em and you knock ’em down”, and snuggled while she had her bottle. She even napped for an hour. Such a sweet baby. Hard to believe she’ll be a year old next month. Time flies, huh?

So I think I’ve solved the tights-eating tendencies of my new boots. I found this pattern on Ravelry by Joan De Lurio. She calls them Boot Buffers. I scrounged around in the stash and tested the pattern with my old green handspun and came up with these:

BootBuffers1

Perhaps a little snug and maybe too short. This yarn isn’t bulky enough. These may get frogged after I test them out for awhile to see if they slip down. So then I scrounged around some more and came up with 2 different black worsted-weight yarns and modified the pattern a little:

BootBuffers2

I used both yarns together, added an extra purl stitch between the ribs and repeated the rib pattern one more time to make them a little longer. So far I like them better than the green ones. I still have to darn in the yarn ends.

I also saw that someone had made more of a fold-over cuff version so I invented these on the needles:

BootCuffs

I used a skein of hand-dyed gray worsted wool and 5.5mm needles. I hope to get photos of these in my boots so you can see how they work. The wider cuff edge folds over the outside of the boot top and the rib hugs my leg inside the boot shaft. But I’m not yet sure how well they will stay put during a long walk. They are currently in Test Mode. I’d certainly rather chew up old yarn than new tights.

In other news, the important thing we accomplished yesterday was to get our credit union accounts unlocked after Tuesday’s lost wallet fright. They were very good about it and made sure T-Man showed his ID before reinstating everything. Just in time too – we had to go pick up the Westphalia after getting her windshield with the new rubber gasket replaced and needed to pay the $200 insurance deductible before they’d let us take her. The broken headlight lens has also been replaced so apart from needing a good wash, she’s all fixed up now. That was an expensive couple of rock pings we picked up on our vacation! At least the insurance paid for most of it. Unfortunately it’s getting harder to source parts for a vehicle that’s nearly 23 years old.

Later this afternoon T-Man & I are off to Circle Craft’s Christmas Market. This is a huge and rather prestigious craft sale that includes demos and entertainment and we haven’t been for a couple of years. At least I’ve already bought the tickets online so we can’t procrastinate this time! We have no plans to buy anything at all but we love to play lookie-loo. Besides, I know at least 2 of the vendors personally so it’ll be nice to say hi. Have I mentioned that I used to work at Circle Craft in their Granville Island shop? I recently realised that was over 20 years ago now! Yikes.

Wednesday, November 09, 2011

Crisis Narrowly Averted

Yesterday I lost my wallet. It dropped out of the zipper pocket on my backpack. I had just gone to the grocery store only 3 blocks from my house, paid for the groceries, carefully zipped up the pocket on my wallet, shouldered the pack and walked home. It fell out somewhere on that homeward journey.

I’d just gotten in the door and put my pack down when I noticed the pocket was flapped open. My wallet was gone! I looked everywhere including going all the way back to the store with T-Man. Nope. Nothing. Panic.

After walking all the way back home again we started calling to put holds on the credit cards and block my credit union accounts. There were cheques in my wallet which caused the advisor on the phone to suggest the block. Now we were effectively penniless! I spent a lot of time on the internet trying to figure out which replacement cards I needed to apply for first. I carry a lot of my life around in that wallet. Makes me rather vulnerable I think.

A couple of hours later T went to turn on the front porch light. You know, just in case a Good Samaritan had returned my wallet? And there it was on the porch beside the front door. Even though the bills and bus tickets were gone, as far as I can tell the rest is all still there – including several dollars in change! You can imagine my relief. The credit cards are reinstated but I have to go in today to get them to release my bank account in person. Besides I need to withdraw some cash.

So this was an expensive and stressful lesson. I’m not very happy with this backpack. I’ve only had it for a few months and the zippers are metal and hard to zip up but they unzip way too easily! Besides it’s already looking ratty. I’m on a hunt for a better one. Meanwhile I’ve moved my wallet to a different pocket. Hopefully it will be better behaved in future.

Now I’m totally nervous to see what happens next because this is not the first of these incidents of lost possessions! A month ago T-Man lost his wallet, discovered while we were out when he went to pay for a purchase. Luckily it was at home in his computer chair. Next he lost his cell phone while we were out shopping. After backtracking our route he located it in a store where it had dropped off and been turned in. Whew. Then just a short while before my wallet went walkies, he found he’d misplaced his house keys. We found them in the basement near his bike where he’d dropped them after coming in the day before. He was wet from the rain and was stripping off gear to hang to dry. Enough already! No more lost items, OK?

I’m done. I have to babysit the Littlest Grandbeastie today and she’ll be here soon. Apparently she’s all rashy from some virus. Poor baby. Wish me well. I may be taking her to a doctor’s appointment. In the rain.

Monday, November 07, 2011

Presents!

Who needs that stinkin’ old holiday that comes near the end of December?! We got presents right now! Lots of them – mostly purchased by ourselves but that’s OK. At least we get exactly what we want, right?

Firstly, I actually got a real birthday present:

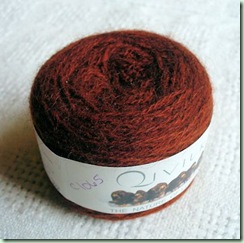
QiviukYarn

Yes, that is a teeny ball of 100% Qiviuk 2/14 (laceweight). Squee!! From my dear MIL who got it for me when she was on a trip to the Arctic. And it’s such a luminous burnt red embers colour. Love. At only 218 yards it’s going to become a neckwarmer. Probably this one. With beads of course.

And I get to knit my neckwarmer with my new set of Addi Lace Clicks interchangeable needles! More squeeI haven’t really worked with them yet but I think I’m going to like them. For one review go here. Don’t miss her review of the original Addi Turbo Clicks too for a discussion of the connections. (BTW the reviewer is Kyoko whose kimono jacket pattern I admired in the latest Knitcene. Small world, huh?) If that’s not enough of a recommendation then you might try Clara’s post on Knitters Review. Do note that the new Lace Clicks are nickel-coated like the Turbos though, not brass like her review set.

Personally, I like the tips. Nice and pointy but not too sharp. I’m OK with the fact they’re nickel-plated instead of brass. I like the fact you don’t need a tool to connect things and the joins seem pretty secure. I don’t mind the short tips. I’ve got very small hands anyway and the fit within my grasp just fine. I like that the sizes start at 3.5mm, one size smaller than other interchangeables, but I don’t like the fact they skipped sizes between US 10 and 11. In metric sizing there are actually 3 in between 6mm and 8mm! Apparently there are 6.5mm and 7mm tips available separately. I’ll order them if I find I miss those sizes. I don’t especially like the super-long connector. I’d rather have 2 shorter ones instead. And there are no included stoppers. I use stoppers a lot in my Denise set but here those are also a separate item, adorably called Heart Stoppers. The case is elegant but rather larger than it needs to be. The real negative of course is the price, equivalent to nearly 3 sets of Denise or 8 or 9 regular Addi Lace circulars (which BTW I use all the time). But with 8 sets of tips and 5 cords the Clicks give you many more options. Can’t do good work without good tools! That’s my excuse and I’m sticking to it. Now I can ditch a bunch of old stiff needles that I never use unless I’m desperate. I like the tips on my old aluminum Aeros but hate the horrid plastic cables. Anybody want ’em before they hit the thrift store?

More spoilage! I’ve been looking for some in-between boots for awhile. Something higher than my Blunnies but lower than my shiny black pirate boots. Something a little casual and funky and perhaps brown. I finally found some that I like:

NewBoots

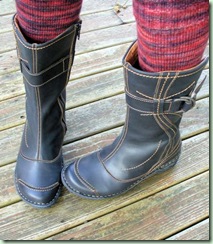
Josef Seibel’s Bergamot boots. Unfortunately they aren’t brown, though with all the gold hand-stitching and golden-tan lining they give that impression in some lights. They’re actually supposed to be black but look more like a super-dark gray in bright daylight. They also are not waterproof which would have been a deal breaker except that they were marked down twice from $199.99 to a final cost of just over $60 including tax! I have a waterproofing product that should help but I just won’t wear them in the rain if I can help it. Though the heel is a little high for me, they’re very comfy. My only quibble is that the top of the zipper stitching chewed up my new tights. The inside flap doesn’t quite reach the top to cover the rough edges there. Definitely something to watch out for. Perhaps that’s why they were on deep discount? I need to take them to my cobbler to see if he has a solution. Or maybe I’ll just take a nail file to the area and see if I can soften it up. Also maybe knit a cuff to cover it. Need to hunt for a appropriate yarn and make up a pattern.

And that’s not all! T-Man and I have been reviewing our current television-watching habits and realised changes need to be made. We usually spend dinnertime eating in bed watching TV on his computer screen. Besides the crumbs in the sheets, this seems rather silly. We have a perfectly comfortable living room. It even includes a nice woodstove which hasn’t gotten used for the last few winters because we weren’t in the room with it. So why were we watching the computer? The truth is we only had an ancient and rather tiny CRT television and (gasp!) old VCR system in the living room so we’ve been using the PC’s Media Center to record shows instead. When you go to bed at 9pm you almost never get to watch them when they’re actually broadcast. And then because they were recorded on the computer we had to watch them there too. In the bedroom. And with only one chair and no room for another, we sat in bed which is naturally comfy (pllows! blankets!) but the computer screen is a little too far away for good viewing. And we ate dinner there too because that’s the only time we get to watch TV. Something had to change to get us out of this rut.

So T decided now is a good time (before he retires next spring) to get a PVR and a new flat-screen HD-TV. Since we have nowhere in the living room to hang it on a wall, we got a 40” Sony LED screen and put it on the table at the back of our handmade couch – right where the old TV set was. It’s big enough that we can see it comfortably from our chairs (a big improvement right there) but it’s not too overwhelming. I think he wants to screw the base down to the wood for security though. (Grandbeasties have a tendency to jump around. Funny how that happens, eh?) Now we just need a course in how to use the darn PVR remote! You need a computer science degree to figure it out. There are too many buttons and none of them are intuitive. I’ve been a competent computer user for 30 years and I’m not stupid but it’s like learning to use a complex program all over again! Who designs these things? Did they test them on real people or just fellow techies? Even T, who helps people with their technical problems for a living, had to call the cable company’s support line for assistance in getting things set up properly. No wonder the store offers to hook things up for you for an extra fee. Most people probably need all the help they can get.

Now I’ve got one DVD I need to review for you. After I’ve watched it on the new screen of course! I’ll give you a hint: there are natural dyes involved.

Do I feel totally spoiled now? Yes, I do!

Tuesday, November 01, 2011

Is It November Already?

I learned a new word: backblogged. That’s what happened when I wanted to blog my fabulous holiday but it was sooooo much work to do. It took me a long time to choose the photos (out of 1000) and format them, write up the travelogue, check forgotten facts and post. It had the effect of stopping me from posting other things because I was holding off until I’d completed the trip posts. Now that I’ve finished them, I’m finding it much easier to blog more often. Blog dam broken; flood ensues.

So, we survived the Zombie Apocalypse. We were attacked by a small dragon:

Mini-Dragon Grampa-Monster

…though who’s eating whom here? Drive-by trick-or-treating granddaughter (and her silly Grampa-Monster). Her parents got the candies and we got to play with the mini-dragon for an hour. Fair trade.

We didn’t get very many trick-or-treaters at the door even though the weather was clear and not too cold. I think a lot of parents are substituting local events and parties for the door-to-door schlep. Too bad because we really enjoy the kids, especially the little ones. Now we have way too much candy left, even though we doubled up on them while passing them out. At least they’re ones we like ourselves! But we’ll have to ration them rationally. Heh.

T-Man and I also spent a good deal of time yesterday afternoon roasting and peeling some of our chestnuts. It was windy all day and the neighbours were doing a good job of picking up the nuts outside our fence so I got the ones inside our yard. Technique: cut an X in the shell (so they won’t explode), put on a cookie sheet and roast at 425F. for 20-30 minutes until skins loosen, cool just until you can handle them without burning your hands, peel while still hot. They were really yummy right out of the oven. All we ended up having for dinner were chestnuts and some cold leftover barbequed pork ribs eaten on the run. Weird, I know. But just about then the knocking at the door started so I didn’t have time to cook anything else. Chestnuts are filling and nutritious anyway. And, if I can beat the neighbours to them, free. We won’t talk about how much work they are to roast and peel! Nope.

Shifting gears here, I want to talk about 2 new magazines just out from Interweave.

image

knit.wear is a new publication, one of the thicker and pricier editions. I couldn’t find it in my favourite magazine shop so I used a 25%-off coupon and bought the digital download (PDF) instead. At least the file is on my computer and not in cyberspace like the one magazine I have on Zinio. I prefer personal control over these things instead of trusting that an online service will stick around in case I need a pattern years after the publication date. It’s not like a gossip or fashion magazine that gets stale almost immediately! And PDF is easier to see on my little netbook than the eMags in Adobe Air format which I have to read on my desktop computer because they aren’t formatted for this screen shape. This is exactly the printed magazine right down to the page numbers and advertising. Page spreads are split into singles though which sometimes looks a little odd.

Enough of the technical stuff, let’s get to the content! The esthetic of the cover speaks to what’s inside. There are some very lovely wearable sweaters in this new issue! They are generally restrained and elegant and use a lot of plain stockinette and add texture rather than colourwork for interest. I also like that they’ve expanded some of the construction details with a special focus on grafting seamlessly. Lots of illustrations make the how-to clearer. They have allowed 144 pages so there’s plenty of room. My fingers are itching to knit Pam Allen’s Tern Vest but there’s too many other projects to finish first.

Definitely a keeper – as long as I can continue to access the PDF file format and don’t lose the file! It will be interesting to see if/when they publish another issue. I’m betting soon because this should be a popular magazine with knitters.

image

The winter issue of Knitscene is just out too and also a keeper. There’s quite a few sweaters that I’d definitely like to make! I particularly like the cover sweater by Romi Hill and the kimono jacket (Uxbridge) by Kyoko aka Cotton & Cloud. This magazine is supposed to be for the younger edgier knitter but I find many of the styles appeal to me too – definitely not the target market! Now I just need to spin and knit faster so I can make more sweaters.

Speaking of which, T-Man has been getting a lot of use out of his new sweater. He loves it! And says so frequently. That makes me very happy. Totally worth all the work it took to make a man-sized handspun sweater. Unfortunately now he wants another one. I should have learned my lesson after I knit his first pair of socks, shouldn’t I?