Sunday, April 29, 2012

Simple Sewing

We’ve been busy with the Littlest Grandbeastie for the last couple of days which was kind of a fun way for T-Man to start his retirement. I warned him that stuff grows to fill the available space but he doesn’t seem too worried about it! Rosebud was a sweetie-pie as usual. So cute that she’s starting to talk now – even though walking yet eludes her. A few steps and it’s down on the well-padded behind. Soon however we’ll be chasing her everywhere, I’m sure. Already we’re chasing her crawling up the stairs to my studio. Hey, who knew that cones of weaving yarn have another use as a rolling toy?

Meanwhile, I managed to finish another sewing project. This one was just a quickie but gave me some helpful experience with Japanese patterns.

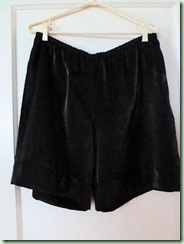
Pettipants

Pettipants

Completed:  April 2012

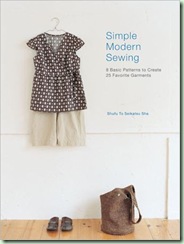
Pattern:  a combination of 4B and 4C from Simple Modern Sewing.

SimpleModernSewing book

Fabric:  polyester/viscose satin (manufactured in Italy), black with silver sparkles, remnant from Dressew, leftover piece from the lining on the Bubble Twist Skirt.

Notions:  1/2” rayon elastic, black; sewing thread and serger thread, both black.

Comments:  I was excited to use a pattern from this book which seems to have lots of very wearable garments in it. (Sister Diane gives a really helpful review here.) However, as a person who is somewhat larger than the average Japanese lady, I was concerned that they wouldn’t fit me without extensive alterations. I was wrong – on this one at least. I only had to make a couple of simple changes. First of all, here’s what the pattern sheet looks like:

PatternSheet

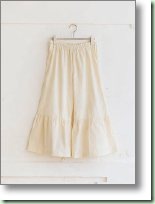
Not quite as bad as BurdaStyle, huh? I used the width given for the loose cropped pants featured on the cover which were wide enough to give me a couple of extra inches of ease which was all I needed. I used the length of these cute petticoat pants, minus the ruffle:

PetticoatPants

These patterns come without seam or hem allowances so I added 2” for the elastic casing at the top edge thinking the height would be sufficient as drafted. Not. I ended up serging the edge and turning down just enough so I could get 1/2” elastic into the casing. Now I’m sure modern girls would consider them high-rise but for me they are a little lower than I prefer – just below my belly button. But I think they will be comfy anyway.

The last adjustment I made was to scoop about 1/4” out of the back crotch curve to accommodate the “older lady butt”. This worked very well.

I was at a loss as to how long to hem the legs because I wasn’t sure exactly which garments I’ll be wearing these with. I compromised at a couple of inches above my knees which should be short enough not to show below anything else. Instead of chopping them off, I just made a rather large 2.5” hem and machine top-stitched it. Unfortunately I got a little bit of puckering with that deep of a hem but this is an undergarment so I’m not going to sweat it. I was also going to add lace but decide that a) I didn’t have anything suitable in the stash and b) I’d rather keep this one simple. After all, isn’t that the title of the book it came from? Anyhow, the deep hem feels rather luxe when wearing.

Now I’m starting to look at other garments in the book, particularly the sleeveless top with the bias ruffles around the neck edge. I think I have an appropriate fabric for this one, if I can find it! Otherwise I’m sure a visit to Dressew will turn up a cheap remnant to experiment with. Don’t think that one will be next on the list though I’m not sure what will be. You’ll find out eventually!

Off to go play in the dirt for awhile…
Wednesday, April 25, 2012

A Little Damp Around The Gills

This is the first day in ages where it’s been raining constantly. And of course this is also the day that I had to hoof uphill to the dentist at the crack of dawn to get my new bridge installed. Fun times! At least we’re done now and all I have to do is take it easy on chomping for 24 hours or so to let the adhesive set and we’re good to go. Hopefully for a good long time. Right now I can tell the freezing is coming out because I can feel the bruise from the needle. Oh poor me.

So what is with people these days? As I was walking in the rain this morning, nobody else nearby (I erroneously thought), listening to podcasts on my iTouch, I suddenly got shouldered aside by a lone jogger. Sheesh! It surprised me. It was just plain rude. He could have yelled out that he was coming and I would have politely moved over. It’s not like the sidewalk was that constricted. It was an older guy too and obviously one with no consideration. His mommy unfortunately didn’t manage to teach him not to shove little old ladies around. What if I was unsteady on my feet and got knocked down? Would he have just kept running and never noticed?

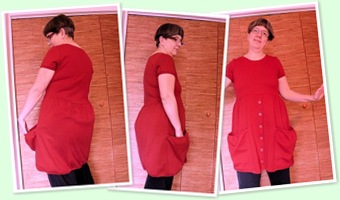
Anyway I did get to wear both my Minoru Jacket and my new Tulip Tunic. Along with my pirate boots with the tops flipped over my knees and an umbrella, I kept pretty dry. Yes, I finished my sewing project yesterday and I’m actually quite pleased with how it turned out, difficulties aside. Wanna see?

Tulip Tunic

Note I was practising my goofy model poses here!

Completed:  April 2012

Fabric:  cotton/lycra interlock, true red, 60” wide/1.5m. From Dressew.

Notions:  6 red plastic buttons, clear elastic, 5/2 perle cotton (emergency string!), Mettler polyester sewing thread, poly serger thread.

Pattern:  Self-drafted using my dartless stretch blocks for the bodice and a ruler for the skirt.

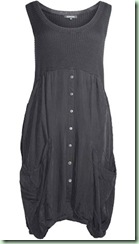
Comments:  This tunic really doesn’t resemble my original inspiration much (a dress from the Navabi website):

Navabi tunic

But that’s just fine with me. I like my version better. I was forced to scrap the ribbing fabric remnant that I was originally going to use for the bodice when I found out that it was too stretchy and lightweight to support the relatively heavy interlock skirt. The clue was this crazy distortion that happened when I tried to bind the sleeve hem:

SleeveDistortion

I was pretty disappointed but realised that I had enough of the interlock to make the bodice as well as the skirt so that’s what I did. I used a little strip of clear elastic to help keep the shoulder seams from stretching out. Luckily this time the bindings worked out fine. I machine-stitched them on before serging just to make sure they were going to cooperate. After serging and pressing flat, I topstitched them down with a small zigzag.

RedButtonI also had trouble with the skirt when the hem binding (which I did differently from the neckline and sleeves) stretched out more than I expected. I saved the slight bubble effect by threading a string through the binding and securing it at the seam-lines. Hopefully it will hold up over time. I probably should have used the same binding technique that I used on the neckline instead of the fold-over version. But I didn’t know that until later!

The buttons are more for decoration than function but I do love the funky pockets. They can hold my hankie and my iTouch.

Oh, and I got this exciting item in the post:

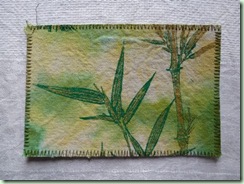
ArtPostcard

It’s an art postcard from Cynthia St. Charles, an art quilter who’s work I admire a lot. This went through the mail all by itself and survived well but with just a little thread coming loose there at the left top corner. Here’s the back (addresses hopefully fuzzed out enough for privacy):

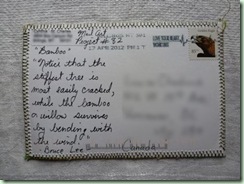
ArtPostcard back

It’s called “Bamboo” and quotes Bruce Lee “Notice that the stiffest tree is most easily cracked, while the bamboo or willow survives by bending with the wind.” I love it! Thanks, Cynthia!

Monday, April 23, 2012

How I Spent Earth Day

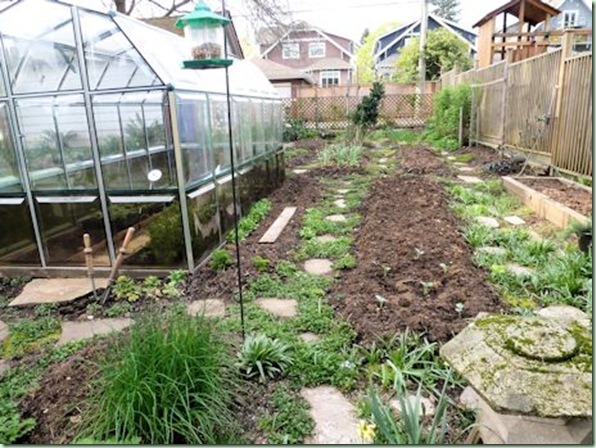
With my hands in the earth, of course! We spent the whole weekend working in the Back 40, as I affectionately refer to the veggie garden:

Back40

I haven’t measured but it’s at least 40 feet anyway! It’s coming along quite nicely I think with the added compost and mushroom manure. The pathways need a little more weeding. I’ve got the kale, cabbage, broccoli, lettuce, leeks and a few other things in. The peas are finally coming up and I’m picking rhubarb, asparagus, lamb’s lettuce, kale buds, chives and green onions. It’s still a little too early to plant the beans, cucumbers, squashes and tomatoes so they are currently spending their days in the greenhouse and their nights indoors. I call it The Daily Schlep as I lug each flat in and out, one at a time.

Speaking of the greenhouse, didn’t T-Man do a lovely job of cleaning the algae, pollen, spider crap and mud off it inside and out? He even repaired a seam in the roof with epoxy glue that had popped open in the winter. See those “sticks” in front of the greenhouse door? He made them a couple of years ago to keep the door from swinging when we want it to stay open. One stays behind to support the door (which doesn’t open any further) and we push the other into the dirt in front sandwiching the door between. Holds pretty well too even in a strong wind. I love how the turned handles are weathering with a nice patina.

So this is T’s last week of work before he retires. Yay! They’re throwing him a nice dinner on Thursday and he’s been somewhat surprised and gratified at how many coworkers came to his desk over the last few weeks to tell them how great he is and how much they will miss him. As a Technical Response Specialist in the printing field, he has the rare combination of gifts: tech skills and people skills. He not only fixed the customers’ problems but always generously spent time mentoring coworkers and answering their questions. He liked his current job (most of the time) but he realised that he would prefer to spend his time while he is still relatively young and healthy to enjoy himself and do things that he wants to do rather than to have to constantly struggle to learn new systems and deal with seemingly arbitrary changes. The equipment that he was hired 8 years ago to support has been given an official “end of service life” so he says he’s going to join it. I hope they miss him a lot! So far there is nobody to take his place. Now I finally get him all to myself after 40+ years of sharing him with his job. Heh!

Meanwhile, back in the studio my latest dress (or tunic or whatever it is) is not going well. I made a really nice skirt part with slouchy pockets. I had some trouble with the narrow band on the skirt bottom that was supposed to bubble the hem in a bit – but it didn’t. So I threaded a string through the band and stitched it securely at the seams. Hopefully it will hold things in the way I want. However, unfortunately the bodice part is not cooperating at all. If you remember, I was trying to use a cotton rib for the tunic’s top but it doesn’t seem to have enough body to support the weight of the heavy cotton/lycra interlock of the skirt part. Plus, when I tried to bind the sleeves with self-fabric they stretched completely out of shape. Just horrible. I was so disappointed! I was happy that I tried the sleeves first before tackling the neckline but it doesn’t really matter, it’s just not going to work. So I’m scrapping the ribbing altogether (it was a $2.99 remnant) and will re-cut the bodice and sleeves in the same fabric as the skirt part. So what if I can’t get the t-shirt I wanted out of the remainder? There’s more fabric in Dressew just waiting for me! And anyhow I’d rather end up with something wearable than a wadder. But I’m renaming it the Tulip Tunic because the skirt reminds me of an upside-down red tulip. Don’t laugh. I’m trying to come up with better project names here.

More on this one anon.

Wednesday, April 18, 2012

Cheap & Cheerful

It’s kind of dark and dreary today, raining on and off, so I thought I’d carry on with something a little brighter – red!

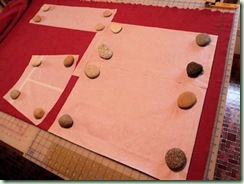
CuttingOut

Why do those glacier-smoothed rocks that I use for pattern weights thrill me so? They bring a smile to my face every time I use them as I remember the delightful places where they were collected. But I digress. This lovely red stuff is the cotton/lycra interlock that I’m using for the lower half of the Two-Fabric Dress. I finished the pattern and cut out the ribbing for the top part yesterday. Yes, I did add little sleeves. Just because. And I had enough fabric.

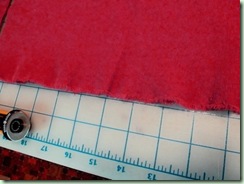
This fabric has very interesting selvedges:

WavyEdges1

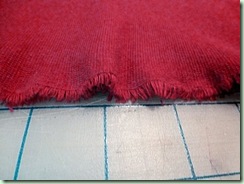
Want to see that closer?

WavyEdges2

They are so wavy that I have to keep several centimetres away from the edge for fear of having some very oddly-shaped garment pieces. Luckily I have lots of fabric – even taking into consideration a second top from this piece. Perhaps I can incorporate the funky selvedge into the second garment somehow. I’ll have to ponder that one. I really enjoyed making my own pattern nearly from scratch and it didn’t take long at all. It was more fun than trying to fit a commercial pattern anyhow. I used my own stretch bodice block, the neckline from my Tie-Dye Tunic, my stretch sleeve block and a ruler. The most complex piece to draft was that fan-shaped pocket which just took a little slashing and spreading. Easy-peasy.

It’s so empowering to create a personalised version of something that I see rather than depend on the pattern companies to come up with something I like. Even the independent pattern makers are mostly out for me. There’s a list of North American ones courtesy of Sewingplum here but there are others too. I’m not really enamoured of most of the offerings. (A pleasant exception was Sewaholic’s Minoru jacket.) And some on that list are still offering patterns that have been around so long they are no longer, ahem…cutting edge. And then I still have to make them fit me. Because, hey, most of the designers/pattern-makers haven’t figured out yet that they are not drafting for most of us and our real bodies. I don’t mind having to chop off sleeves for my short arms and add width for my Botticelli Belly. Or even adjust for my narrow/sloping/forward shoulders because those are not everybody’s problems. But when nearly everyone needs to do an FBA and the sleeve caps all have too much ease in them, then you know there’s something not right with the basic block/sloper and the grading system they use. At least one indie is taking this seriously though. StephC of 3 Hours Past has a great post on her thoughts on body shapes and pattern grading here. Something needs to change. And until it does, I’m on a pattern-buying moratorium. Which is cool because it forces me to get better at drafting my own.

Also, yes, I should come up with better names for my projects. However the practical person that I am is a) too lazy and b) can never remember what a fancier title refers to. I always envy those who can fling pattern numbers and sweater names around with abandon and actually recall what exactly each one looks like. I am not so lucky. Either that or my brain just doesn’t want to waste space on such trivia. It’s too busy remembering the lyrics to some stupid song from 1965. I’m digressing yet again, aren’t I?

So, as I’ve been hunting down sewing blogs recently I’ve certainly noticed a few things. Most of the bloggers are younger than me and a goodly percentage even younger than my children. Of course I don’t hold their youth against them in any way but it does mostly result in them having considerably different tastes to mine. Also they mostly have less extreme fitting issues than I do. While I can admire their efforts, praise their results and occasionally learn a few new tricks, I’m still (as usual) feeling very much on the fringes. For some reason even more so than in the knitting milieu.

Do I sound whiney? I’m not really. Lets face it, I’ve never in my life followed the crowd! (OK, maybe my total adoration of the Beatles as a teenager in the 1960’s…) However I would love-love-lovitty-love to have a sewing buddy who can help with fitting and perhaps even with my photography. My darling T-Man is very willing but not very skilled and not (yet!) often available when I’m in the throes of a project. I know lots of people who knit, weave, spin, and dye but only a few who sew and none who are interested in pursuing the Fine Art of Fitting with me. Oh well.

Meanwhile, I’m learning lots and actually enjoying myself muchly. I do apologise to my lovely readers who are not as obsessed with garment sewing as I am currently. I’m still knitting but it just goes around and around and around. Very pleasantly mindless. But not exciting to show off. If you hang in here though I might veer off at any time in another crafty direction. You never know. Damselflies are like that. They have wings and they know how to use them!

So go flit back to the studio, damselfly.

Tuesday, April 17, 2012

Sexy, Sleek and Sophisticated

NOT! I think my own personal style has to be the exact opposite of the post’s title. But guess what? I don’t care. The best thing about getting older is that you don’t have to listen to those who are telling you that you aren’t pretty enough, thin enough, rich enough or whatever else enough because, honey, you know that already! And nothing is really going to “fix” it. So you can be immune to their sales pitch. You can get on with your life in whatever way you please. Be happy with what you do have while you’ve got it. Because life is just too damn short.

Whew! Got that off my chest. And in keeping with my usual pas-de-courant fashion, here’s my latest FO:

Bib-Front Shirt

CountryShirtCountryShirt back 

Don’t I look all prairie-girl? OK, maybe prairie-old-lady. I’m not going to repeat all the info I gave in my last post so you’ll have to go there if you need reminding. In a nutshell, I took an already-cut-out ‘90’s big shirt and refashioned it into a better-fitting (if not really much more stylish!) top. After I re-cut I still had to do a bit more tweaking to the shape while sewing, taking in the sides a little more at the waist and sewing a narrower seam at the underarm and back section of the sleeve and tapering to normal seam allowances at the front armscye. My only complaint is that the cuffs are a wee smidgeon tight but not enough that I would take it apart to try to rectify this. I didn’t bother putting a button on the neck band because I never do that one up anyhow! It stands quite nicely without. Now hopefully it will end up getting worn somewhat. Maybe I’ll try it with leggings and my pirate boots. (Avast, me hearties!) Better than sitting around in my drawer for 17 years as fabric scraps, huh?

Next up I’m working on drafting a pattern for something like this:

Navabi tunic

Sorry, I purloined borrowed this pic ages ago from Navabi’s website and of course the link to this garment’s page no longer exists. Fashion moves on! And of course I forgot to note the designer. Bad blogger. I did lighten up the photo some so you can see the details better though.

Anyhow, I liked the two different fabrics aspect of this tunic/dress, the baggy pockets and the bubbled hemline. Instead of black though, I have two red knits, a remnant piece of heavy ribbing and a length of cotton/lycra interlock, plus 6 matching buttons which should work ok. Not the crispy shiny woven fabric of the skirt part in the photo but perhaps a better choice for comfort and easy-care. Currently I’m working on the pockets. They could be weird or they could just make this garment special. We’ll see, won’t we? It’s all an experiment! And I should still have enough of the interlock left afterwards to make a t-shirt.

BTW in case you were concerned, there is nothing illegal or wrong about using another garment as inspiration for your own. Even the “big boys” do this all the time. Indeed the entire clothing industry works this way. You can’t copyright clothing because it’s deemed useful and its decorative function is secondary. At least until the laws are changed, the only time it becomes illegal is if you put someone else’s designer label on it and pass it off as the real thing. Also a fabric’s design itself can be copyrighted. This can be a big issue particularly with quilting and home-dec prints. Though I guess only if you are printing up the fabric commercially using someone else’s design without permission. Kinda out of the league of us home-crafty types. I can’t even copy my own printing and dyeing work. Heh.

Saturday, April 14, 2012

Some Progress

The air smells of flowers and the weather has been mostly warm and sunny for the last few days – perfect gardening weather! So that’s what we’ve been doing. And I currently smell of eau d’dead fishies thanks to giving my little plantlings a boost of fish fertiliser. Yum. Garden beds are looking good after a layer of compost and manure. Now I just need to plant a few things in them as soon as the babies are hardened off enough to handle being outside at night. Oh, and the peas are coming up! At least they were until I covered them up again with compost. Plus we had rhubarb sauce mixed with yoghurt on the pancakes this morning. Deelish.

I finally set up the tripod to take a couple of photos of my latest finished sewing project. Unfortunately it was a bad hair day so I chopped off my head! Don’t worry – you aren’t missing anything.

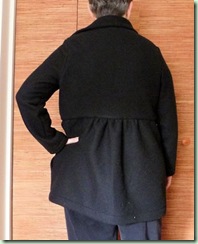
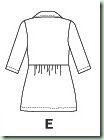
Black Fleece Jacket

FleeceJacket frontFleeceJacket back Date:  April 2012

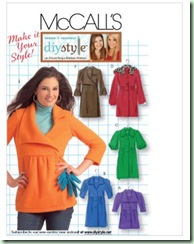
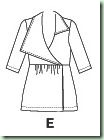
Pattern:  McCall’s 5714 (2008, OOP), View E.

M5714M5714e line frontM5714e line back

Fabric:  polar fleece, black, 66” W x 2 metres (plus 1 metre left), spent at least 10 years marinating in the stash. Bodice lining and inseam pockets: waffle-textured knit, 100% polyester, black, recent purchase from Dressew (more left for something else too).

Notions:  Sewing thread, 2 giant black snaps.

Modifications:  Many! Cut shoulders and neckline in size 12, adjusted for round shoulders, did a 1” FBA adding side and under-bust darts, added an extra 1/2” to the whole bodice length (beyond the FBA). Back bodice needed a shoulder dart for rounded back. Cut skirt section 1” wider than size 18 plus folded the facings narrower. Added inseam pockets. Took some of the fullness out of the top of the sleeve and lengthened them by 3” to full length.

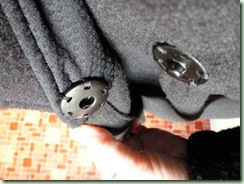
Comments:  I’m not sure this jacket was worth all the work I put into it! It’s neither particularly warm nor particularly flattering and I can’t get much more than a t-shirt underneath. On the other hand, I may have increased the back width a little more than I should so it’s a wee bit baggier than I’d like. I have no idea whether or not this fleece will last without major pilling either. It remains to be seen how much wear I get out of this jacket. However I adore the collar! And the monster snaps:

FleeceJacket snap det

They’re over an inch wide and are really easy to handle. In this photo you can also see the textured knit I used for the bodice lining (including the back which wasn’t in the original instructions). Contrary to my initial fears I had no problems with the thick seams and the sewing was actually pretty uneventful.

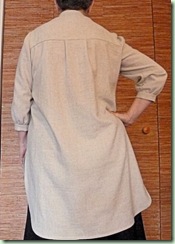
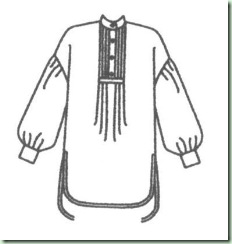
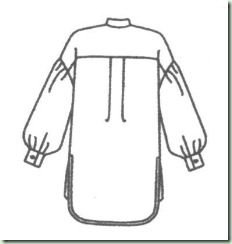
My next sewing project is coming along. I only have maybe one more sewing session to finish up. To recap, I dug out an old OLD! project that’s been lurking in my drawer for eons. The pattern is from 1994:

V8913

Vogue 8913 and purchased in 1995 according to a faded receipt inside. I had cut View A out in a size 12:

V8913a_linefront   V8913a_lineback

Might be considered a size 12 but the thing was huge! However I loved the fabric so much that it survived a number of purges over the next 17 years:

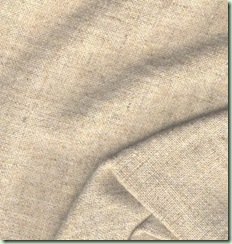
Oatmeal linen blend

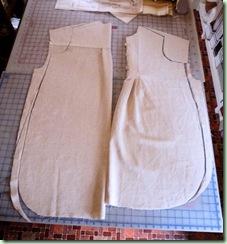
There’s some linen content in there but I have no idea what else. Luckily I hadn’t sewn any seams at all yet so I had a relatively easy time redesigning the shirt. I completed sewing the front pleated section right down to the buttons and buttonholes and inserted it in the main front piece. It was not easy sewing and the way the things were drafted made it worse than it should have been. The tucks and pleats were a PITA to figure out. And who just leaves the inside seams raw? (I serged them!) I also sewed the yoke and yoke facing to the back. Then I laid them out and used my dartless block to re-cut the shoulders and sides down to a more reasonable size:

Shirt body recut

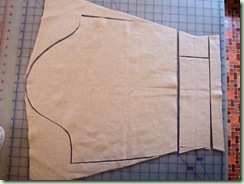
You can see how much fabric I took off because I didn’t want the dated drop-shoulders. Then I did a similar re-cutting on the sleeves:

Shirt sleeve recut

This brings them down to 3/4 length to be gathered into a narrow cuff (the wider bottom piece). I also cut down the band collar to match the 1” width of the cuffs. I’m not too sure whether I’ll keep the lengths of the body pieces where the back is several inches longer than the front but I’ll decide when I get the side seams sewn and the sleeves in. The collar is on and so far it’s looking good. At least a lot better than the original! And hopefully it will finally actually see the light of day on my body instead of the inside of my sewing drawer.

Wednesday, April 11, 2012

Shoes & Stuff

This is going to be a relatively quick post. I finished my black fleece jacket but haven’t gotten photos yet. Plus it’s too warm to wear it right now! I knew that was going to happen. More on that project soon. What I really have to show off today are my new shoes:

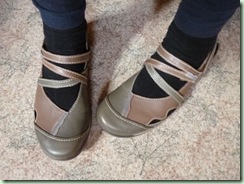
New Shoes

Cute Romikas in khaki and taupe. Lots of velcro adjustments. Removable suede footbeds. Best of all – immediately comfortable. Yay! I’ve been on a hunt for a new pair of shoes that I can actually walk in for quite awhile now. I’ve dragged poor T-Man into innumerable shoe stores. This one was a little indie shop happily called Comfy Feet and we were walking by so I just slipped in on a whim. I was really looking for something in gray but I’ll settle for these which coordinate quite well with a lot of items in my wardrobe. The best part is I wore them home directly! Several kilometres later and no chafing or pinching. Just enough support for my fussy feets. So I’m in love with Romika, a German company started in the 1920’s but now part of the Josef Seibel group. These are really well made but in Vietnam. Nobody manufactures in their own country these days, do they?

I also got out in the garden for a while and it felt really good to play in the dirt again! There is so much more to do, but then there always is with a garden. We’re still trying to prepare the beds for planting while I spend every day bringing out the flats of seedlings and then putting them back inside at night. I think I could have left them out last night though. It was quite toasty! I’ll probably start leaving them in the greenhouse now until they can get in their beds. Everything is doing really well except for that supposed scourge of the west, woad. My seeds are not germinating and I’ve replanted them twice. I only have one stinkin’ plant out of about 2 dozen seeds. How odd. I’m not really bummed though because I’m cutting down on my dye plants this year until I use some of what I already have!

Off to the studio. I have a big shirt that I started to sew so long ago I don’t remember when that was. The pattern is dated in the ‘90’s and it is voluminous! I have plans to use my personal block to trim it down and restyle it into something more reasonable. The fabric is nice even though it’s an oatmeal-coloured blend of unknown origins. I liked it enough not to pitch the thing so it behoves me to do something with it.

Saturday, April 07, 2012

The Week That Was

Wow! We’re way into April and it’s been a whole week since I’ve posted. What’s gotten into me? I guess I’ve been both busy and tired. On Wednesday I went to the dentist to get the prep work for my new bridge done. I managed to only choke and splutter once which was a huge feat, I can tell you. I’ll spare you the grizzly details but I now have a quite functional temporary bridge glued in. It has to last until the 25th when I get the real thing. Oh. Joy.

Right after my appointment and while I was still frozen up to the eyeball (literally) I decided to hop Skytrain and go downtown to Dressew. I still needed to get some lightweight stretchy black fabric for the bodice lining for the fleece jacket (McCalls 5714). I hope I’ve managed to adjust the pattern to fit me and although it’s still rather close-fitting, I think I like it that way. But I decided to finish it properly except to face it with something lighter instead of self-lining. I also want inseam pockets and the polar fleece is much too bulky for that.

So I found some textured poly knit that will work and of course got enough to make a t-shirt as well. I also got some nylon/lycra in a dark chocolate brown for a tankini bathing suit and a whole lot more lingerie elastic for more bloomers. However I couldn’t help myself when I saw they had some lovely linen and linen blends in stock! I resisted enough to only buy two pieces: dark brown stretch linen for pants and a cotton/linen twill for a tunic. The rest of them were calling me but I closed my ears. La-la-la…can’t hear you…

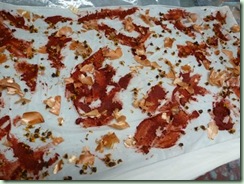
Also this week I finally managed to dye my silk crepe scarf in an “eco-dye” technique. This was my first real experience with this and I was curious how well it would turn out. The scarf had already been mordanted in alum so I soaked it in water, squeezed it out and spread half of it on a plastic drop cloth. I already knew what items I was going to use on the silk: red sandalwood sawdust “mud” (leftovers from an attempt to extract the colour for a dye session over a year ago and surprisingly not mouldy!), onion skins and a sprinkle of dried coreopsis flowers.

EcoDyeScarf1

I folded over the other half of the scarf and patted it down:

EcoDyeScarf2

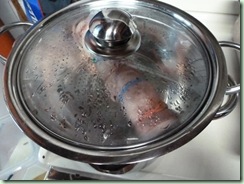
Then I folded it one more time to make it narrow enough to fit in my steamer. I rolled it up and secured with rubber bands:

EcoDyeScarf3

Then I steamed it for an hour or so and then left it to cool overnight:

EcoDyeScarf4

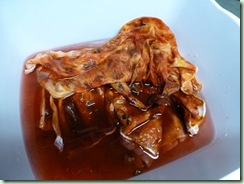
I like this new stainless steel pot with the clear glass lid. The colander fits right in and the lid fits on top to make a nice little steamer setup. It’s also a nice size for small batches of dye rather than my big 15 and 20-litre ones. The next day I took off the rubber bands and rinsed out the plant matter in a dishpan:

EcoDyeScarf5

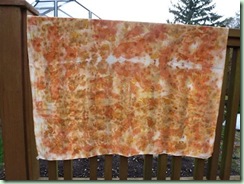
I didn’t want all that stuff to clog the drain so I dumped it in the compost instead. A good rinse, a little Orvus and another rinse and the water was running clear. The scarf dried really quickly and I should have just ironed it right away. I had to spritz with water and use lots of steam to get the crinkles out. There’s still a few permanent creases but that’s ok. I’m quite pleased with the final effect:

EcoDyeScarf6

Obviously I should have been a little more careful at the fold line and edges if I wanted a completely covered cloth. The inkblot effect is kind of interesting however. And a detail:

EcoDyeScarf7

I just love the nifty prints that the onion skins made. The dark dots are from the coreopsis and the red blotches are the sandalwood. I have a whole pail of that stuff still and really should use it. It didn’t work very well as an extracted dyestuff but really needs to contact the fibre to colour it properly. Cloth seems to work much better than yarns did and you’d never get all the powdered sawdust out of fleece! The success with the scarf is giving me ideas for cloth however.

Thursday was Spectrum Study Group and since I wasn’t interested in making book covers I just knitted and socialised. It was also the one-month anniversary of the Zombie Plague. I’m still coughing. Grrrr….

Friday was a day off for T-Man so we went walking. The sun was out when we left home but while we were having fish and chips on Granville Island a big cloud came over and dumped rain and hail. We tried to wait it out inside the Kid’s Market but it just went on and on. Of course we didn’t have umbrellas! (Even though I had dragged them around with me in the sunshine for the 2 days before that.) So we stayed under the Granville Bridge as long as we could, slunk through the pedestrian tunnel and then sidled up to Broadway under as many awnings as were available. By the time we got to Chapters we were a little damp around the ears! While we waited for awhile in the book store, the rain stopped and we dashed for home but it started again before we got to Cambie Street. There were drifts of hail in patches too so it must have been heavy but spotty. By the time we got home it had pretty much let up. Timing is everything, huh?

Today is official Muck Out The House Day. It’s been getting a lick and a promise for weeks. This probably won’t be much better but at least it’s a stab at chasing down the dust buffaloes. The grandbeasties will just mess it up tomorrow anyhow!

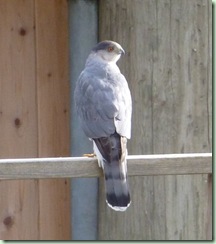
Before I forget, we heard the birds at our feeder fluttering away and squeaking alarm calls. Then this handsome Coopers hawk landed nearby:

CoopersHawk

It’s a somewhat bigger than our small northwestern crows and has really pretty ruby eyes. It also missed its lunch – at least at our house. Hope it found the pickings better elsewhere. A bird’s gotta eat, ya know.

Happy Easter or whatever you happen to celebrate – or not!